
The adjuster may only be at your property for a short time, but that inspection can shape every repair decision that follows. An insurance adjuster meeting checklist helps you prepare the evidence, questions, and people needed to make sure storm damage is clearly seen and properly documented. The goal is not to argue or guess at coverage. It is to present an accurate picture of what the storm did to your roof and exterior.
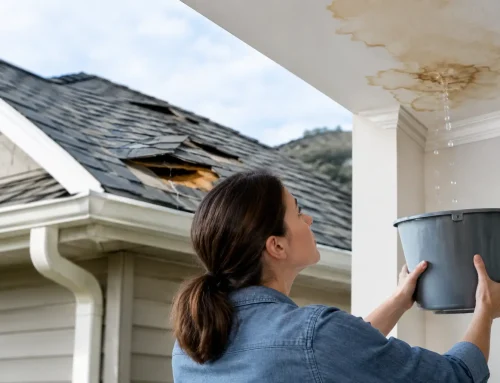
After hail, high winds, fallen limbs, or driving rain, damage is not always obvious from the ground. A missing shingle is easy to spot. Hail bruising, lifted tabs, damaged flashing, dented vents, compromised gutters, and water entry around roof penetrations can be much easier to miss. A prepared meeting gives the adjuster a cleaner record and gives you a better starting point for restoring the property.
Prepare Before the Adjuster Arrives
Start by confirming the date and time of the appointment, the claim number, and the adjuster’s name and contact information. Ask whether the adjuster expects access to the roof, attic, garage, interior rooms, or fenced areas. If access will be limited because of a locked gate, pets, tenants, or business operations, address that before the appointment rather than losing valuable inspection time.
If conditions are unsafe, do not climb onto the roof yourself. Loose shingles, wet surfaces, damaged decking, and hidden soft spots can turn a claim inspection into an injury. Take ground-level photos where you can do so safely, and leave roof-level documentation to a qualified exterior contractor and the adjuster.
Build a Clear Damage File
Photos and notes work best when they tell a simple, chronological story. Gather pictures or video from immediately after the storm, along with any images showing the property before the loss if you have them. Include wide shots that establish the area, then closer photos of specific damage. For example, show the damaged gutter on the side of the home, then take a close image of the dent or separation.
Keep records of emergency actions as well. If you paid for emergency tarping, water extraction, tree removal, or temporary repairs to prevent additional damage, save invoices, receipts, and photos. Most policies require reasonable steps to protect the property from further loss, but permanent repairs should generally wait until the damage has been inspected and documented unless immediate action is necessary for safety.
For commercial properties, organize records by building, elevation, or unit. A property manager who can identify which leaks occurred in which suites, when they started, and what was done to protect occupants makes the inspection more efficient.
Review What You Know About the Claim
Bring your claim number, policy information, deductible amount, and all correspondence from the insurance carrier. You do not need to become a policy expert before the meeting. You do need to understand the basics: the reported date of loss, the type of damage you reported, and whether the carrier has requested any information.
Your deductible is your responsibility under the policy, not a bargaining tool. Be cautious of anyone who offers to waive, absorb, or hide it. Honest restoration work starts with clear expectations about the claim payment, your deductible, and the work that is actually needed.
Insurance Adjuster Meeting Checklist
Have these items ready before the adjuster arrives:
- Claim number, adjuster contact details, policy documents, and storm-date information.
- Photos and video of roof, siding, gutters, windows, screens, fences, and interior damage.
- A written timeline of the storm, when damage was discovered, and any leaks or changes since then.
- Receipts for emergency mitigation, temporary repairs, cleanup, or damaged personal property.
- A list of concerns by location, such as the rear roof slope, chimney flashing, north-side siding, or kitchen ceiling.
- Access to attic spaces, garages, gates, electrical panels if needed, and areas where interior staining or moisture is visible.
- A qualified contractor who can identify storm-related exterior damage and discuss repair requirements.
- A notebook or phone for recording what the adjuster inspected, photographed, and said they would include.
This checklist is not about overwhelming the adjuster with paperwork. It is about preventing important details from being overlooked when the inspection moves quickly from one area to another.
What to Do During the Inspection
Be present if possible, or designate someone who knows the property and can make decisions about access. Follow the adjuster through the inspection when appropriate, but give them room to perform their work. Point out each concern calmly and specifically. “There is a water stain in the upstairs bedroom after the April hailstorm” is more useful than “the roof has been a problem.”
A reputable contractor can be a valuable resource at this meeting. They can identify damage patterns, explain how roofing components work together, and compare visible conditions with the repair scope the property may require. Their role is to provide factual documentation and professional observations, not to decide coverage. The insurance carrier makes the coverage decision under the policy.
Ask Questions That Clarify the Scope
Before the adjuster leaves, ask what areas were inspected and whether they found damage to the roof, gutters, siding, flashing, vents, or interior. Ask whether they will prepare an estimate, when you should expect it, and how you will receive it.
If damage is acknowledged, ask whether the estimate includes related items needed to complete the repair correctly. Roofing work may involve drip edge, flashing, pipe boots, ridge ventilation, starter materials, underlayment, gutters, and code-related requirements. What is included depends on the damage, local building requirements, policy terms, and the existing construction.
You can also ask what happens if your contractor finds additional covered damage after the initial estimate. Supplemental documentation is common when concealed damage is discovered during approved work or when the original scope missed a necessary component. The key is documenting the condition before it is repaired or removed whenever possible.
Take Your Own Notes
Write down the areas the adjuster examined, their preliminary observations, and any next steps they mentioned. If they use terms you do not understand, ask for a plain-language explanation. This is your property and your claim. You should leave the meeting knowing what was inspected and what will happen next.
Avoid signing contracts, assignments, or broad authorizations you have not had time to read. A service agreement for emergency work may be necessary, but you should understand its purpose, price, and obligations. Pressure has no place in a storm restoration decision.
After the Meeting, Compare the Estimate to the Damage
When the carrier’s estimate arrives, review it line by line with a qualified contractor. Look beyond the total dollar amount. Confirm the property address, date of loss, damaged elevations, roof measurements, material type, and listed repairs. An estimate that omits a damaged slope, a detached gutter run, or necessary flashing may not fully reflect the documented loss.
Differences do not automatically mean anyone acted in bad faith. Adjusters work from the conditions available at the inspection, and contractors may identify additional details during a closer evaluation or after materials are opened. What matters is responding with photos, measurements, manufacturer requirements, local code information when applicable, and a clear explanation of why the added work is necessary.
If you disagree with a claim decision or scope, respond promptly and keep communication in writing when possible. Ask the carrier what documentation is needed for reconsideration. Do not let an unanswered estimate sit for months while a small leak becomes a larger repair.
When the First Scope Misses Damage
Storm claims sometimes need a second look. That is especially true when there is concealed damage, matching concerns, or interior moisture that was not visible during the original inspection. Request a reinspection through the carrier when you have specific new evidence, not simply because the first estimate was lower than expected.
A contractor experienced in storm restoration can prepare supporting photos and repair information for that conversation. Crown Exteriors helps property owners document exterior damage, meet with adjusters when requested, and understand the repair scope without making promises that no one can honestly guarantee.
The most helpful next step is simple: keep the property protected, keep your records organized, and make sure every visible concern is addressed before the adjuster leaves. A calm, well-documented meeting can replace a great deal of uncertainty with a clear path toward repairs.
Related Posts
If you enjoyed reading this, then please explore our other articles below: