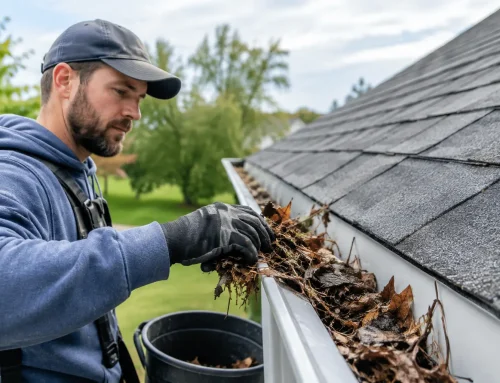

A few lifted shingles can look minor from the driveway. But after a high-wind storm, that small opening can allow water beneath the roofing system, loosen flashing, damage gutters, and create a much larger repair if it is left exposed. This wind damage restoration example shows how a well-managed response can protect the property, document the loss clearly, and keep the insurance process moving without adding unnecessary stress.
The details of every claim are different. Coverage depends on the policy, the cause of damage, deductibles, prior conditions, and the insurer’s findings. Still, the restoration process follows a practical sequence: protect the structure, inspect thoroughly, document accurately, coordinate with the adjuster, and complete the approved repairs with quality materials and careful cleanup.
A Wind Damage Restoration Example, Step by Step
Consider a homeowner whose neighborhood experienced a night of strong straight-line winds and heavy rain. The next morning, they noticed several shingle pieces in the yard, a gutter hanging slightly away from the roofline, and a small brown spot forming on a second-floor ceiling.
The homeowner did the right thing by avoiding the roof. Wet roofing is unsafe, and walking on storm-damaged shingles can cause more breakage or injury. Instead, they took photos from the ground, moved belongings away from the ceiling spot, and scheduled a professional inspection.
Step 1: Stop further damage first
The inspection found wind-lifted and missing shingles along a roof slope, damaged ridge caps, and exposed areas near a vent pipe. Water had entered beneath the shingles and traveled along the roof decking before appearing inside the home.
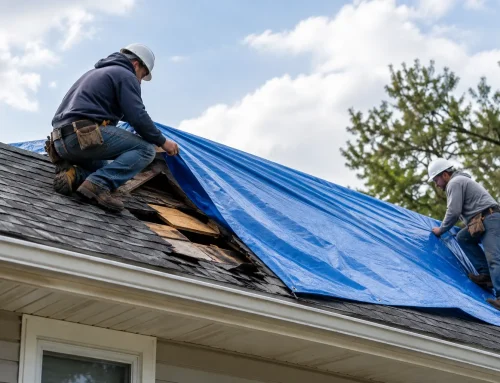
Before discussing replacement options or claim estimates, the priority was preventing additional water intrusion. A temporary tarp was installed over the affected slope, and the loose gutter section was secured. Emergency protection does not replace a permanent repair, but it can help limit additional damage while the claim is reviewed.
This is one reason timing matters. Waiting until the next rainfall can turn a roofing issue into damaged insulation, stained drywall, mold concerns, or electrical risk. Prompt action is not about rushing into a major project. It is about protecting what can still be protected.
Step 2: Document the full scope of the loss
A proper storm inspection looks beyond the obvious missing shingle. In this example, the contractor photographed the damaged shingles, creased tabs, exposed fasteners, displaced flashing, gutter separation, and interior water staining. They also measured the roof and recorded the material type, roof slopes, vents, valleys, and other components that could affect the scope of work.
The homeowner received clear photos and an explanation of what the damage meant. Wind damage often leaves telltale signs such as lifted shingle edges, horizontal creases, broken seals, missing tabs, bent metal, or loosened siding. Some of these signs are difficult to see from the ground, which is why a detailed inspection is more useful than a quick glance after a storm.
Accurate documentation also separates storm-related damage from normal aging. That distinction can matter during an insurance review. Honest contractors should explain what they see without promising coverage or inflating the scope. If a roof has wear that is unrelated to the storm, the property owner deserves a straightforward answer.
Step 3: File the claim with useful information in hand
After reviewing the findings, the homeowner contacted their insurance carrier to report the date of loss and visible storm damage. They provided the inspection photos and any requested information while keeping records of conversations, claim numbers, and emails.
The insurer then scheduled an adjuster inspection. This is often where property owners feel uncertain. An adjuster’s estimate may not match the contractor’s initial findings exactly, especially when damage is concealed beneath shingles, flashing, or other materials. A difference in scope is not automatically a conflict. It can simply mean more documentation or a closer review is needed.
Crown Exteriors can meet with the adjuster when appropriate, point out documented storm damage, and help ensure the inspection considers the affected roofing and exterior components. The goal is not to pressure the adjuster. It is to make sure the property is evaluated based on the actual conditions found at the site.
Step 4: Review the insurance scope before work begins
In this example, the initial insurance estimate included roofing repairs, gutter work, and interior staining repairs. During the restoration planning process, the contractor identified additional damage to a flashing area that required a supplement request. Supporting photos and measurements were submitted for review.
This stage requires patience. Some claims move quickly; others require additional inspections or documentation. Property owners should not assume that the first estimate is always the final word, but they also should not authorize work based on guesses. A dependable restoration partner explains what is approved, what may need further review, and what costs remain the owner’s responsibility, such as the deductible or non-covered upgrades.
Material matching is another practical consideration. If only part of a roof is damaged, an insurer may approve a repair rather than full replacement. Whether a repair is the best option depends on the roof’s age, the availability of matching shingles, local requirements, and the extent of damage. A contractor should explain the trade-off clearly: repair may cost less and be sufficient, while replacement may be more appropriate when wind damage is widespread or the existing system is near the end of its useful life.
What the Restoration Work Looked Like
Once the scope was approved, the permanent work was scheduled around weather conditions and material delivery. The crew removed the damaged roofing materials, inspected the roof decking, replaced compromised sections where needed, and installed the new roofing system according to manufacturer requirements.
The project also included new flashing at the affected penetration, repair of the gutter attachment, and replacement of damaged downspout components. The temporary tarp came down only when the roof was ready to be restored. This sequence matters because a property should not be left vulnerable between emergency service and permanent repairs.
Good workmanship includes details homeowners may not see after the job is complete. That means properly secured shingles, protected roof penetrations, correct flashing integration, clean gutter flow, and attention to ventilation where applicable. It also means respecting the property during the project, using reasonable site protection and performing a thorough cleanup for nails and debris.
After the exterior work was complete, the homeowner could move forward with interior repairs after confirming the source of water intrusion had been addressed. Repairing a ceiling before the roof is watertight can lead to repeat damage, so the order of work matters.
What Property Owners Can Learn From This Example
The strongest outcome in a storm claim is not simply receiving an approval. It is restoring the property correctly and reducing the chance of another problem months later. That starts with a prompt inspection and continues with complete documentation, clear communication, and a repair plan that fits the actual damage.
If you suspect wind damage, do not rely solely on what is visible from the ground. Watch for missing shingles, granules around downspouts, loose gutters, bent metal, damp attic insulation, ceiling spots, or water around vents and chimneys. If there is active leaking, protect the interior and request emergency help right away.
A professional inspection can give you a clearer picture before small storm damage becomes a larger restoration issue. You deserve direct answers, careful workmanship, and support through each step of a stressful situation.
Related Posts
If you enjoyed reading this, then please explore our other articles below: