
The adjuster meeting is one of the most important moments in a storm damage claim. Knowing how to prepare for an adjuster meeting can help you clearly show what happened, avoid overlooked damage, and keep your claim moving forward. You do not need to be a roofing expert, but you do need organized information, a safe property, and a clear record of the damage.
An insurance adjuster is there to inspect the loss and estimate what your policy may cover. Their visit is not a sales appointment, and it is not the time to guess about damage or accept a rushed conclusion. Preparation gives the adjuster the details needed to evaluate your roof, siding, gutters, and related interior damage accurately.
Start With Safety and Temporary Protection
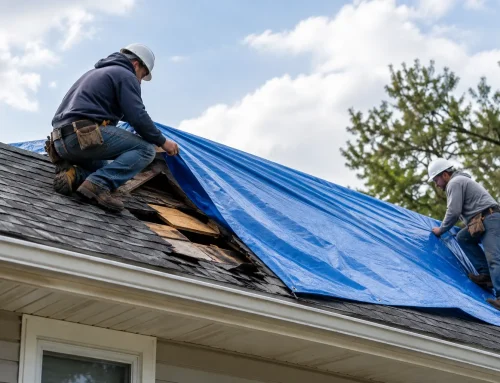
Do not climb on a roof, walk under loose materials, or try to repair dangerous storm damage yourself before the appointment. If your roof is leaking or exposed, take reasonable steps to prevent additional damage. That may include placing containers under an active leak, moving belongings away from wet areas, or arranging emergency tarping.
Keep receipts for reasonable temporary repairs and materials. Insurance policies generally expect property owners to prevent further damage when possible, but temporary protection should not erase evidence of the original loss. Take photos before covering an opening or removing damaged materials whenever it is safe to do so.
If there is structural damage, downed electrical equipment, unstable trees, or a compromised ceiling, prioritize safety and contact the appropriate emergency professionals. An adjuster meeting can wait if the property is unsafe.
Document the Damage Before the Adjuster Arrives
Storm damage is easier to explain when you have photographs from immediately after the event. Take clear, well-lit photos and videos of every affected area. Include wide shots that show the overall condition and close-up images that show specific damage.
For exterior damage, document missing or lifted shingles, hail impacts, damaged flashing, dented gutters, torn screens, fallen branches, broken siding, and damage to vents or metal components. From inside the property, photograph water stains, damp insulation, peeling paint, warped flooring, damaged personal property, and any active leaks.
Try to capture context. A photo of a dented gutter is helpful, but a wider photo showing its location on the home is better. If you have older photos of the property, keep them available as well. They can help establish that the condition appeared after the storm rather than before it.
Write down the storm date, approximate time, and what you observed. Include details such as high winds, hail, heavy rain, visible debris, or water entering the building. Avoid exaggeration. A simple, factual record is more credible and more useful than a long account based on assumptions.
Gather the Right Information for the Meeting
Put your claim-related documents in one place before the adjuster arrives. Having the information ready keeps the inspection focused and reduces the chance that important details are forgotten.
Bring or have access to the following:
- Your insurance claim number and adjuster contact information
- Your policy information, if available
- Photos and videos taken before and after temporary repairs
- Receipts for emergency tarping, water mitigation, or other necessary protection
- A list of damaged areas, including interior and exterior concerns
- Records of prior repairs, warranties, or recent maintenance when relevant
You do not need to interpret policy language on the spot. If you have questions about deductibles, depreciation, exclusions, or coverage limits, write them down and ask your insurance representative for clarification. The adjuster can explain their inspection findings, but your insurer is the final source for policy-specific coverage questions.
Have a Professional Inspection Before the Adjuster Meeting
A qualified contractor can identify damage that may not be visible from the ground or obvious to an untrained eye. This is especially helpful after hail or wind events, when shingle bruising, creased tabs, damaged flashing, and compromised roof components can be easy to miss.
A contractor’s inspection does not replace the adjuster’s inspection. Instead, it gives you an independent, property-specific record of the damage and repair needs. It also helps ensure that the meeting includes all affected components, not only the most visible issue.
Crown Exteriors can inspect storm-related roof and exterior damage, document the findings, and meet with your adjuster to help keep the conversation focused on the actual condition of the property. The goal is not to pressure the adjuster. It is to make sure the inspection is thorough, accurate, and supported by clear evidence.
Know What to Expect During the Walkthrough
The adjuster may inspect the roof, gutters, siding, windows, exterior fixtures, and interior areas affected by water. They may take measurements, photographs, notes, and samples of damaged materials. Depending on the size and complexity of the claim, the visit may take less than an hour or several hours.
Be available to point out each area on your damage list. Start with the exterior, then show interior issues and any emergency repairs that were needed. If there are areas the adjuster cannot safely access, such as a steep roof or an unsafe attic, do not push the issue. A professional contractor may be able to provide photos, measurements, or additional documentation.
Ask the adjuster what they observed and whether they need anything else from you. Take notes during the conversation. Record the adjuster’s name, phone number, email address, and any next steps they provide. If they mention that a report or estimate will be sent later, ask when you should expect it.
Keep the Conversation Factual and Focused
The best way to prepare for an adjuster meeting is to be clear, respectful, and specific. Explain what you saw, when you saw it, and what temporary steps you took to protect the property. Let the photos, inspection findings, and physical evidence support the claim.
Avoid guessing about the cost of repairs or arguing about coverage before the estimate is completed. It is reasonable to ask questions, but the meeting is more productive when everyone can inspect the property without unnecessary conflict. If the adjuster does not include an item you believe was damaged, ask them to explain why and note it for follow-up.
Do not feel pressured to sign a repair contract during the adjuster visit. Take time to review the insurance estimate, compare it with the documented scope of work, and understand what repairs are necessary. A trustworthy contractor should explain the work clearly, including materials, workmanship protections, and any costs that may not be covered by insurance.
Review the Estimate Carefully Afterward
An adjuster may not give you a final answer at the meeting. The insurer typically prepares an estimate and claim decision after the inspection. When you receive the estimate, compare it to the areas of damage documented during the walkthrough.
Look beyond the bottom-line number. Review whether the estimate includes key parts of the repair, such as tear-off, underlayment, flashing, ventilation, gutters, siding, trim, interior repairs, debris removal, and required code-related items. The necessary scope depends on the property and the type of loss, so not every claim will include the same components.
If something appears missing, do not assume the decision is final. Ask your contractor to review the estimate against the inspection findings. Additional documentation may support a supplement request when damage or required work was not included in the initial scope. This is common in restoration work, particularly when concealed damage is found after materials are removed.
Prepare Differently for Commercial Properties
Commercial property managers may need a more detailed plan. Before the adjuster meeting, gather maintenance records, lease-related responsibilities, vendor invoices, photos from multiple building elevations, and reports of business interruption or tenant impacts when applicable.
Arrange access to roof hatches, mechanical areas, vacant units, and affected interior spaces. If the property has multiple stakeholders, designate one person to accompany the adjuster and keep communication organized. A clear point of contact prevents conflicting information and helps the claim move more efficiently.
A well-prepared meeting cannot guarantee a specific coverage outcome. It can, however, give your claim the strongest possible foundation: a safe property, organized records, a complete inspection, and a factual account of the loss. That preparation helps you move from storm damage to a clear repair plan with far less uncertainty.
Related Posts
If you enjoyed reading this, then please explore our other articles below: