
A severe storm rarely leaves you with one clear problem. It leaves you with questions. Is the roof actually damaged or just dirty? Do you call insurance first or a contractor first? If water is getting in, how fast do you need to act? This storm restoration process guide is built to answer those questions in plain language so you can protect your property, avoid delays, and make better decisions under pressure.
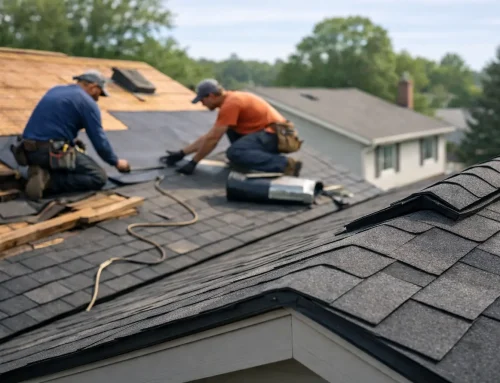
When wind, hail, or heavy rain hits, the first priority is safety. Stay out of any area with active leaks near electrical fixtures, fallen tree limbs, or visible structural movement. If the damage is severe, temporary protection such as emergency tarping may be needed right away to limit interior water damage while the next steps are arranged.
What the storm restoration process actually looks like
Most property owners expect restoration to begin with repairs. In reality, the process starts with documentation and inspection. If you skip that part or move too fast, you can create problems with insurance coverage, scope disagreements, or missed damage that shows up later.
A typical storm restoration process guide should start with five stages: immediate protection, professional inspection, claim documentation, insurance adjustment, and final repair or replacement. That sounds straightforward, but each stage matters because the quality of the next step depends on the one before it.
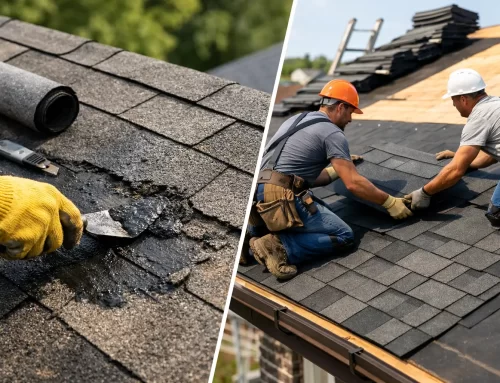
For example, a roof may show obvious missing shingles, but the more expensive issues are sometimes less visible at first. Hail can bruise shingles without tearing them off. Wind can loosen flashing around chimneys and vents. Gutters, siding, fascia, and soft metals may all show signs of impact that support the claim. A complete inspection looks at the full exterior system, not just the area you can see from the driveway.
Step 1: Prevent more damage before anything else
If your property has been exposed, time matters. Water entering through a damaged roof can affect insulation, ceilings, drywall, flooring, and even framing if it is left alone long enough. A fast response does not mean rushing into permanent repairs. It means stabilizing the property.
That may include tarping a roof, covering broken windows, clearing drainage paths, or moving valuables away from wet areas. Take clear photos and video before any temporary work begins if you can do so safely. Insurance carriers generally expect property owners to take reasonable steps to prevent additional loss, so this part protects both the building and your claim.
Keep receipts for emergency materials or mitigation work. In many cases, those costs may become part of the claim, but documentation is what supports reimbursement.
Step 2: Schedule a professional storm damage inspection
This is where many claims are won or lost. A proper inspection should identify storm-related damage, separate it from normal aging where possible, and document the findings in a way that supports the claim process. For homeowners and property managers, that means the inspection needs to do more than confirm there is a problem. It needs to create a clear record.
An experienced storm restoration contractor will inspect roofing materials, vents, flashing, valleys, ridge caps, skylights, gutters, downspouts, siding, and other exterior components that may have been affected by the same event. They should also check for functional damage, not just cosmetic marks.
It depends on the storm type, too. Hail damage often requires close-up evaluation of shingle surfaces and metal components. Wind damage may involve lifted tabs, creased shingles, or torn seals that are easy to overlook from the ground. With commercial buildings, membrane systems, drainage patterns, and rooftop penetrations often need a different level of review than a residential roof.
Step 3: Understand how the insurance claim fits in
After the inspection, the next move is usually filing a claim if storm-related damage is confirmed. Some owners call insurance first, others call a contractor first. Either order can work, but having a documented inspection before or alongside the claim often gives you a clearer starting point.
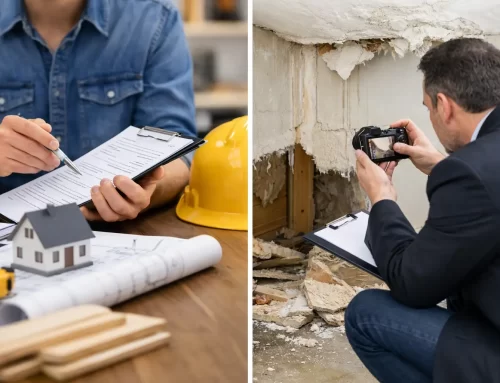
The key is accuracy. When a claim is filed, the insurance company assigns an adjuster to evaluate the loss. That adjuster is not there to design the repair project for you. Their role is to assess damage under the policy terms. That is why detailed contractor documentation can be so valuable. It helps make sure the full extent of the loss is visible, explained, and less likely to be underestimated.
This is also the point where confusion tends to build. Deductibles, depreciation, code items, partial repairs, and matching issues are not always simple. Some policies cover replacement cost, while others pay actual cash value up front. Some claims include interior damage and some do not, depending on the cause and the policy language. You do not need to become an insurance expert overnight, but you do need a contractor who can explain what the paperwork is saying and where questions may come up.
Step 4: Meet the adjuster with documentation in hand
The adjuster appointment is one of the most important moments in the storm restoration process guide because it can shape the scope of work, pricing, and timeline. If your contractor is present, they can help point out storm-related damage, provide measurements, and answer technical questions about repairability versus replacement.
This does not guarantee every item will be approved on the spot. Sometimes supplemental documentation is still needed. Sometimes an adjuster agrees on roofing damage but not on gutters or siding. Sometimes there is enough evidence for replacement, and sometimes a repair is the right call. A trustworthy contractor should be honest about that distinction. Not every roof needs full replacement, and forcing that conclusion when the damage does not support it can backfire.
What matters most is a fair and complete review. If important damage is missed, it may need to be revisited with photos, test squares, product information, or local code requirements. The process can feel slow, but solid documentation usually leads to better outcomes than assumptions.
Step 5: Review the scope before repairs begin
Once the claim is approved, many property owners are eager to start immediately. That makes sense, but this is the time to slow down just enough to confirm what is and is not included. Review the approved scope, materials, and payment structure. If your roof, siding, gutters, or other exterior components are being restored, the written agreement should reflect that clearly.
Ask practical questions. Will damaged decking be addressed if it is discovered during tear-off? Are permit requirements included? Will there be upgraded materials available, and if so, how are those handled? If your insurance scope is missing items needed to complete the job correctly, supplements may need to be submitted before or during production.
This is also a good time to talk about product choices. A storm claim often starts with damage, but the finished project still affects your home’s appearance and long-term protection. Shingle color, ventilation, gutter performance, and manufacturer-backed warranties all matter.
Step 6: Repair, cleanup, and final documentation
The best restoration projects are organized and well communicated. You should know when materials are arriving, how long work is expected to take, and what happens if weather delays the schedule. On-site protection for landscaping, driveway use, magnetic cleanup for nails, and final walkthrough expectations should all be addressed before work starts.
Quality control matters as much as speed. Fast service is important after a storm, but not at the expense of workmanship. Proper installation, code compliance, and final inspection protect the value of the claim and the condition of the property long after the storm is gone.
At the end of the job, make sure you receive final paperwork, warranty information, and any photo documentation tied to completed repairs. If depreciation or recoverable funds are still pending through insurance, completion records may be needed to close that part of the claim.
Common mistakes that slow the process down
The biggest delay is often waiting too long to act. Storm damage is not always dramatic from the ground, and many owners hope a small issue will stay small. Unfortunately, hidden roof damage has a way of turning into leaks, interior staining, and claim complications.
Another common mistake is choosing a contractor based only on who can start tomorrow. Responsiveness matters, but so do licensing, insurance, storm restoration experience, and claim support. A low estimate can become expensive if the scope is incomplete or the workmanship creates new problems.
It is also easy to assume insurance will handle everything automatically. Claims still need support, follow-up, and clear communication. A contractor who knows how to document damage, meet with adjusters, and manage the job from inspection to completion can make the process far less stressful. That hands-on support is one reason many property owners work with teams like Crown Exteriors LLC after major storms.
A storm restoration process guide works best when you use it early
Storm restoration is not just about fixing what broke. It is about protecting the property, presenting the damage clearly, and moving through the claim and construction process without unnecessary setbacks. The earlier you bring in the right help, the easier it is to keep small issues from becoming expensive ones.
If your roof, siding, gutters, or exterior have taken a hit, start with a thorough inspection and a clear plan. The right partner should help you every step of the way, explain what they see honestly, and treat your property like it matters – because it does.
Related Posts
If you enjoyed reading this, then please explore our other articles below: