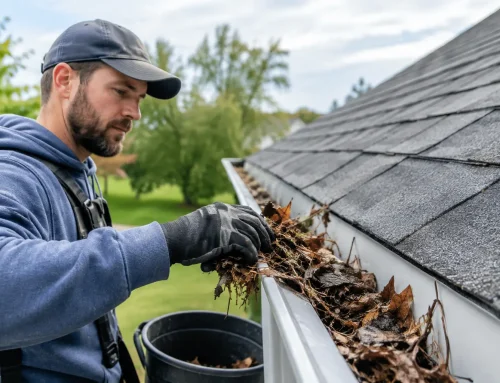

A storm can leave behind obvious problems, such as missing shingles or a fallen tree limb. It can also cause damage that is easy to overlook from the ground. Knowing how to document storm damage photos correctly gives you a clear record of what happened, helps support an insurance claim, and gives your roofing contractor a better starting point for recommending repairs.
The goal is not to prove every detail yourself or put yourself in danger trying to get the perfect image. Your job is to capture honest, organized evidence while the conditions are still fresh. A qualified exterior professional can then inspect the property safely, identify hidden damage, and help you understand the next steps.
Start Before Cleanup or Temporary Repairs
Once the weather has passed and it is safe to walk around your property, take photos before moving debris, patching damage, or beginning cleanup. A tarp, fallen branch, or pile of damaged gutter material may look messy, but it helps show the condition of the property immediately after the storm.
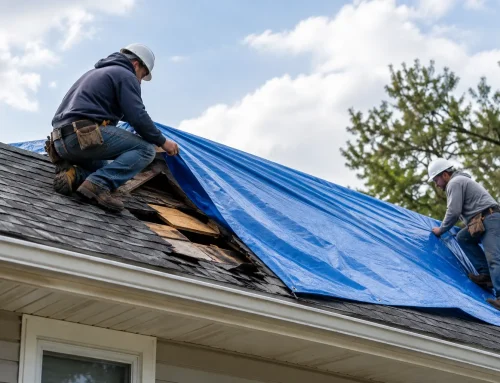
That does not mean you should leave an active leak or dangerous hazard unaddressed. If water is entering your home or business, protecting the interior comes first. Take a few quick photos if you can do so safely, then arrange emergency mitigation. Keep receipts for emergency tarping, water removal, or other reasonable steps taken to prevent additional damage.
Photograph the date and time if your phone does not automatically save that information. Most current phones store this data within each image, but it is still helpful to make a note of when the storm occurred, when you discovered the damage, and what you observed.
Take Wide, Medium, and Close-Up Photos
Strong storm documentation tells a visual story. An adjuster or contractor should be able to see the entire property, understand where damage is located, and view the details without guessing. For that reason, take photos from more than one distance.
Start with wide photos from the street, driveway, or yard. Capture every side of the home or commercial building, along with visible roof slopes, siding, gutters, windows, fences, outbuildings, and nearby trees. These images establish the overall condition and can show the path of wind, hail, or falling debris.
Next, take medium-range photos that show a damaged area in context. If a section of gutter has pulled away, photograph the whole gutter run before focusing on the bend, separation, or impact point. If shingles are missing, take a photo that shows their location on the roof from a safe vantage point.
Finally, take close-ups of specific issues. Look for creased, lifted, torn, cracked, or missing shingles; hail marks on metal components; dented vents; damaged flashing; torn window screens; split siding; bent gutters; and water staining inside the building. Use clear lighting and take more than one photo if glare, shadows, or rain make the first image hard to read.
Stay Off the Roof
A roof may look stable after a storm and still be unsafe. Wet surfaces, loose shingles, damaged decking, hidden punctures, and downed power lines can turn a quick photo into a serious injury. Homeowners and property managers should document what they can see from the ground, a window, balcony, or safely positioned ladder only if they are trained and conditions are secure.
Do not climb onto a roof to inspect hail impacts or missing shingles. Also avoid walking under damaged trees, leaning structures, or sagging gutters. If you suspect structural damage, keep people away from the area and contact a qualified professional.
A professional roof inspection can safely document roof slopes, vents, flashing, soft metal damage, and other details that are not visible from the ground. This is especially useful when a storm caused subtle damage that may lead to leaks months later.
Photograph More Than the Roof
Roof damage often gets the most attention, but a complete claim may involve several exterior components. Storms do not limit themselves to one material, and the surrounding damage can help establish what the property experienced.
Take photos of visible conditions across the property, including:
- Gutters, downspouts, gutter guards, and fascia
- Siding, trim, shutters, soffit, and exterior paint
- Windows, screens, doors, skylights, and glass enclosures
- Fences, decks, sheds, detached garages, and outdoor equipment
- Interior ceiling stains, wet insulation, damaged drywall, or water around windows
For interior water damage, photograph the affected room from the doorway first. Then take closer images of stains, drips, bubbling paint, wet flooring, or damaged belongings. If possible, place a common object nearby for scale, but do not cover or alter the damage to make it appear worse.
Capture Evidence of the Storm Itself
Property photos matter most, but photos of storm conditions can add useful context. If it is safe to do so, capture hail collecting on the ground, large fallen branches, standing water, wind-blown debris, or other visible conditions around the property.
Avoid relying only on images from social media, neighbors, or news reports. They may help tell the broader story, but your own photos of your property are more useful for documenting your specific loss. If a neighbor has similar damage, that can support the need for an inspection, but each property and insurance policy must be evaluated on its own facts.
Keep any storm-related information you receive, such as weather alerts, contractor inspection notes, repair estimates, and communications with your insurer. Create one folder on your phone or computer for photos, receipts, claim documents, and written notes. Clear organization can prevent unnecessary delays later.
Do Not Edit, Filter, or Delete Photos
Insurance documentation should be accurate. Avoid filters, color changes, heavy cropping, annotations, or edits that could make an image appear misleading. If a photo is too dark or blurry, take another one rather than altering it.
Keep the original files whenever possible. You can create copies for emailing or printing, but retain the originals with their date, time, and location information. If you use a cloud backup service, confirm that the full-resolution images are being saved.
Do not delete photos simply because they seem repetitive. Several images from slightly different angles can be helpful when one view does not clearly show the extent of damage. The better approach is to organize them by area, such as front roof slope, rear elevation, gutters, interior leak, or detached garage.
Pair Photos With Clear Notes
Photos are stronger when they are supported by simple notes. You do not need construction terminology. Write down what you saw, where you saw it, and when you noticed it.
For example, a useful note might say: “After the April 18 hailstorm, water began dripping from the living room ceiling near the front window. The stain was first noticed at approximately 7:30 p.m.” That is more helpful than a photo labeled only “ceiling.”
If you have already made temporary repairs, note what was done and why. Include the date, the company or person who performed the work, and any receipts. This helps show that you acted reasonably to protect the property from further damage while preserving the facts of the loss.
Contact Your Insurer and Schedule an Inspection
Once you have documented visible damage, report the loss to your insurance carrier according to your policy requirements. Be factual and direct. Describe the date of loss, the type of storm, and the damage you observed. Avoid guessing about repair costs or causes before the property has been professionally inspected.
Then schedule a qualified exterior inspection. Crown Exteriors LLC can inspect storm-affected roofing, siding, gutters, and related exterior areas, document findings, and help you prepare for conversations with your insurance adjuster. A contractor should never promise what an insurer will approve, but experienced claim support can help make sure visible and accessible damage is properly identified and explained.
If an adjuster is scheduled to visit, have your photos, notes, and emergency repair receipts available. Ask questions when something is unclear, and do not feel pressured to make immediate decisions about repairs before you understand the scope of work, materials, and insurance responsibilities.
Storm damage is stressful enough without wondering whether you missed something. Take safe, honest photos early, protect your property from additional harm, and bring in a trusted professional who can help you move forward with confidence.
Related Posts
If you enjoyed reading this, then please explore our other articles below: