
The first few hours after a storm are when good documentation can save you the most time, money, and frustration. If you are wondering how to document roof damage, the goal is simple: create a clear record of what happened, what was affected, and how the damage is impacting your property before temporary fixes or weather change the evidence.
That record matters for more than your own peace of mind. It can help support an insurance claim, reduce back-and-forth with an adjuster, and give your roofing contractor a clearer starting point. The better your documentation is, the easier it becomes to show the full scope of loss and move your project forward.
Why roof damage documentation matters
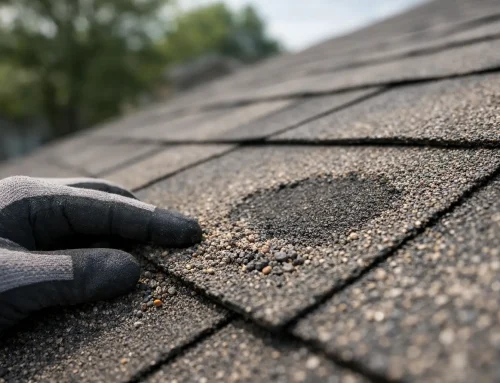
Roof damage is not always obvious from the ground. A few missing shingles may be visible, but bruised shingles, lifted seals, damaged flashing, punctures, and hidden leaks can be missed without a trained inspection. At the same time, waiting too long to document the problem can work against you if rain, wind, debris cleanup, or emergency tarping changes the condition of the roof.
Good documentation helps establish timing, location, and severity. It also creates a paper trail for related damage inside the home or commercial building, such as stained ceilings, wet insulation, damaged siding, bent gutters, or water around windows. Insurance carriers often look at the full picture, not just one photo of a missing shingle.
How to document roof damage safely
Start with safety, not close-up photos. If the roof is steep, wet, high, or visibly unstable, stay off it. A ground-level inspection with a phone camera is better than risking a fall, and a professional inspection is better than either when storm damage is significant.
Walk the exterior of the property first. Take wide photos of every slope you can see, then medium shots of damaged areas, then close-ups where possible. This wide-to-close sequence helps show context. A close-up of a torn shingle is helpful, but it is much stronger when paired with a full-roof photo showing where that section sits.
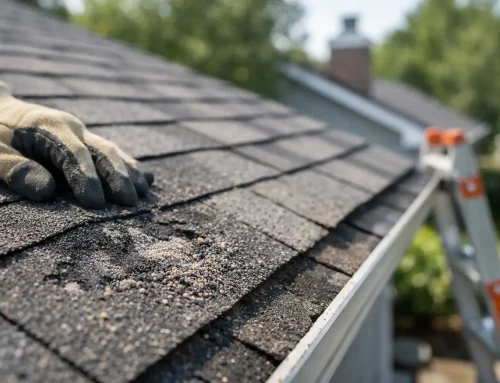
If debris is present, photograph it before cleanup. That includes fallen tree limbs, granules in downspouts, dented vents, bent gutters, damaged fascia, and anything else the storm left behind. After that, document interior signs of roof failure, especially ceiling spots, peeling paint, wet drywall, attic moisture, or dripping around penetrations.
What to photograph and record
Photos do most of the heavy lifting, but notes matter too. Your documentation should show cause, condition, and consequence. In plain terms, that means evidence of the storm, evidence of roof damage, and evidence of resulting property damage.
Capture the date as closely as possible. Most smartphones store metadata automatically, but it still helps to organize images by day and make written notes about when you first noticed the problem. If there was a hailstorm or wind event, write down the approximate time, what you observed, and whether neighbors had similar issues.
Take photos of missing, creased, lifted, or torn shingles. Photograph dented metal components like vents, flashing, gutters, and downspouts. If you see granule loss, take a close shot and another showing where the material came from. Inside the property, photograph water stains from multiple angles and over several days if they spread.
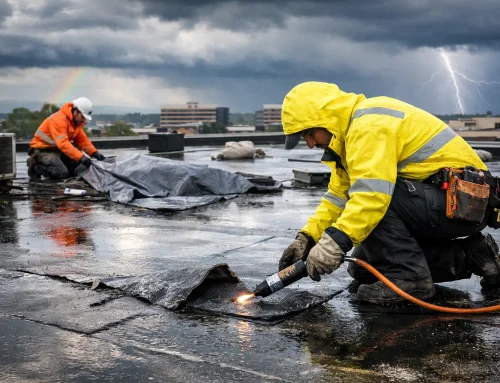
You should also note any temporary steps you took to prevent further damage. If you used a tarp, buckets, fans, or emergency drying measures, record when that happened and save any receipts. Insurance policies usually expect owners to take reasonable steps to limit additional loss, but they also need proof of what was done.
How to organize your roof damage evidence
A disorganized claim file can slow things down even when the damage is real. Keep everything in one folder, whether digital, printed, or both. Separate photos into categories like roof slopes, metal components, interior leaks, siding, gutters, and debris.
Create a simple timeline. Include the storm date, the date damage was first observed, when photos were taken, when temporary protection was installed, when the claim was reported, and when inspections occurred. This timeline can be more useful than people realize because adjusters and contractors often need to compare events quickly.
Save supporting documents in the same place. That may include your insurance claim number, inspection notes, repair estimates, emergency service invoices, weather reports if available, and any emails or texts related to the damage. If you speak with your insurance company by phone, write down the date, the representative’s name, and what was discussed.
Common mistakes when documenting roof damage
One common mistake is taking only a few close-up photos. Those images may show damage, but without wider shots, it can be hard to verify where the damage is located or how widespread it is. Another mistake is cleaning up too quickly. It is natural to want your property back in order, but throwing away debris or removing evidence before documenting it can weaken your file.
Homeowners also sometimes focus only on the roof covering and forget the accessories and interior. Hail may dent soft metals even when shingle damage is harder to spot in photos. Wind may affect ridge caps, flashing, gutters, fascia, and siding at the same time. Water may enter at one point and show up somewhere else entirely.
The biggest mistake, though, is assuming photos alone tell the whole story. Roof damage can be technical. A trained inspection can identify wind creasing, hail impacts, compromised seal strips, and other issues that are easy to miss if you are not in roofing every day.
When to call a professional for help
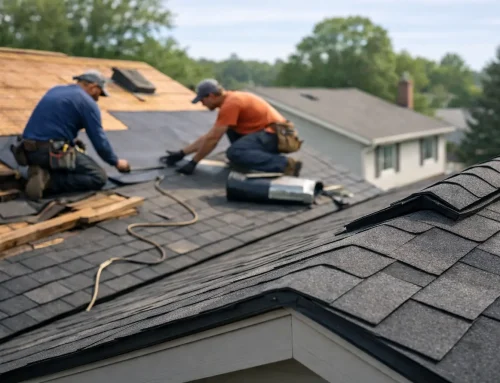
There is a point where documentation should shift from homeowner recordkeeping to professional inspection. If your area had hail, high wind, fallen limbs, active leaking, or visible exterior damage, bring in a licensed roofing contractor as soon as possible. A proper inspection can confirm whether the problem is minor repair work or a larger insurance-related loss.
This is especially important when the damage is subtle. Hail strikes, lifted shingles, and flashing movement are not always easy to prove from a few cell phone photos. A contractor who understands storm restoration can document findings in a way that is clearer for both the property owner and the insurance adjuster.
That support can make the process less stressful. Crown Exteriors LLC helps property owners inspect damage, document the loss, and move through the claim and repair process with a lot more clarity than trying to piece it together alone.
How to document roof damage for an insurance claim
If your end goal is a claim, think beyond pictures and build a complete file. You want to show that a storm event occurred, that your roof and related exterior components were damaged, and that the damage is consistent with what happened on the reported date.
Start with your own photo set and written notes, then add a professional inspection report if one is available. Keep records of every conversation with your insurer. If an adjuster visits the property, note the date and what areas were inspected. If anything was missed, that is where contractor documentation can become very important.
There is some nuance here. Not every roof issue is storm damage, and not every storm-damaged roof needs full replacement. Age, prior repairs, material type, and installation quality all affect what is found and what the next step should be. Honest documentation is always the best approach. Trying to overstate damage usually creates more problems, not fewer.
A simple approach that works
If you remember nothing else, remember this: document early, document thoroughly, and do it safely. Get wide photos, close photos, interior photos, and notes that explain when the damage happened and what changed afterward. Then bring in a professional if the damage looks significant or if a claim may be involved.
A well-documented roof issue is easier to inspect, easier to explain, and easier to resolve. When your home or building has been through a storm, that kind of clarity can make a hard situation feel a lot more manageable.
Related Posts
If you enjoyed reading this, then please explore our other articles below: